How to Connect a SendGrid Inbox to Mailivery
Learn how connect your SendGrid email for warmup with Mailivery.

Lauren Gilbert
Last Update 5 bulan yang lalu
One of the key features of Mailivery is its ability to seamlessly integrate with various email service providers, including the popular SendGrid platform.

SendGrid is a cloud-based email delivery service that offers reliable and scalable SMTP and API-based email solutions. By connecting your SendGrid inbox to Mailivery, you can leverage the combined power of these two platforms to enhance your email program's overall effectiveness and ensure your messages reach your target audience.
For this integration, you need:
- A SendGrid account to send emails (SMTP).
- An IMAP account to receive and manage incoming emails.
Step 1: Create SendGrid Account
1. Access SendGrid: Go to SendGrid's website.
2. Log into your account: Click the “Sign in“ button found at the top-right side of the screen and enter your credentials.

Step 2: Connect Your Domain/Email
1. Access SMTP Settings: On the left-hand side, click on the “Settings” tab and then “Sender Authentication” from the dropdown.

2. Verify Domain/Email: Navigate to the "Single Sender Verification" section and click on the “Verify a Single Sender” button. Click on “Create New Sender” and input your credentials as needed.
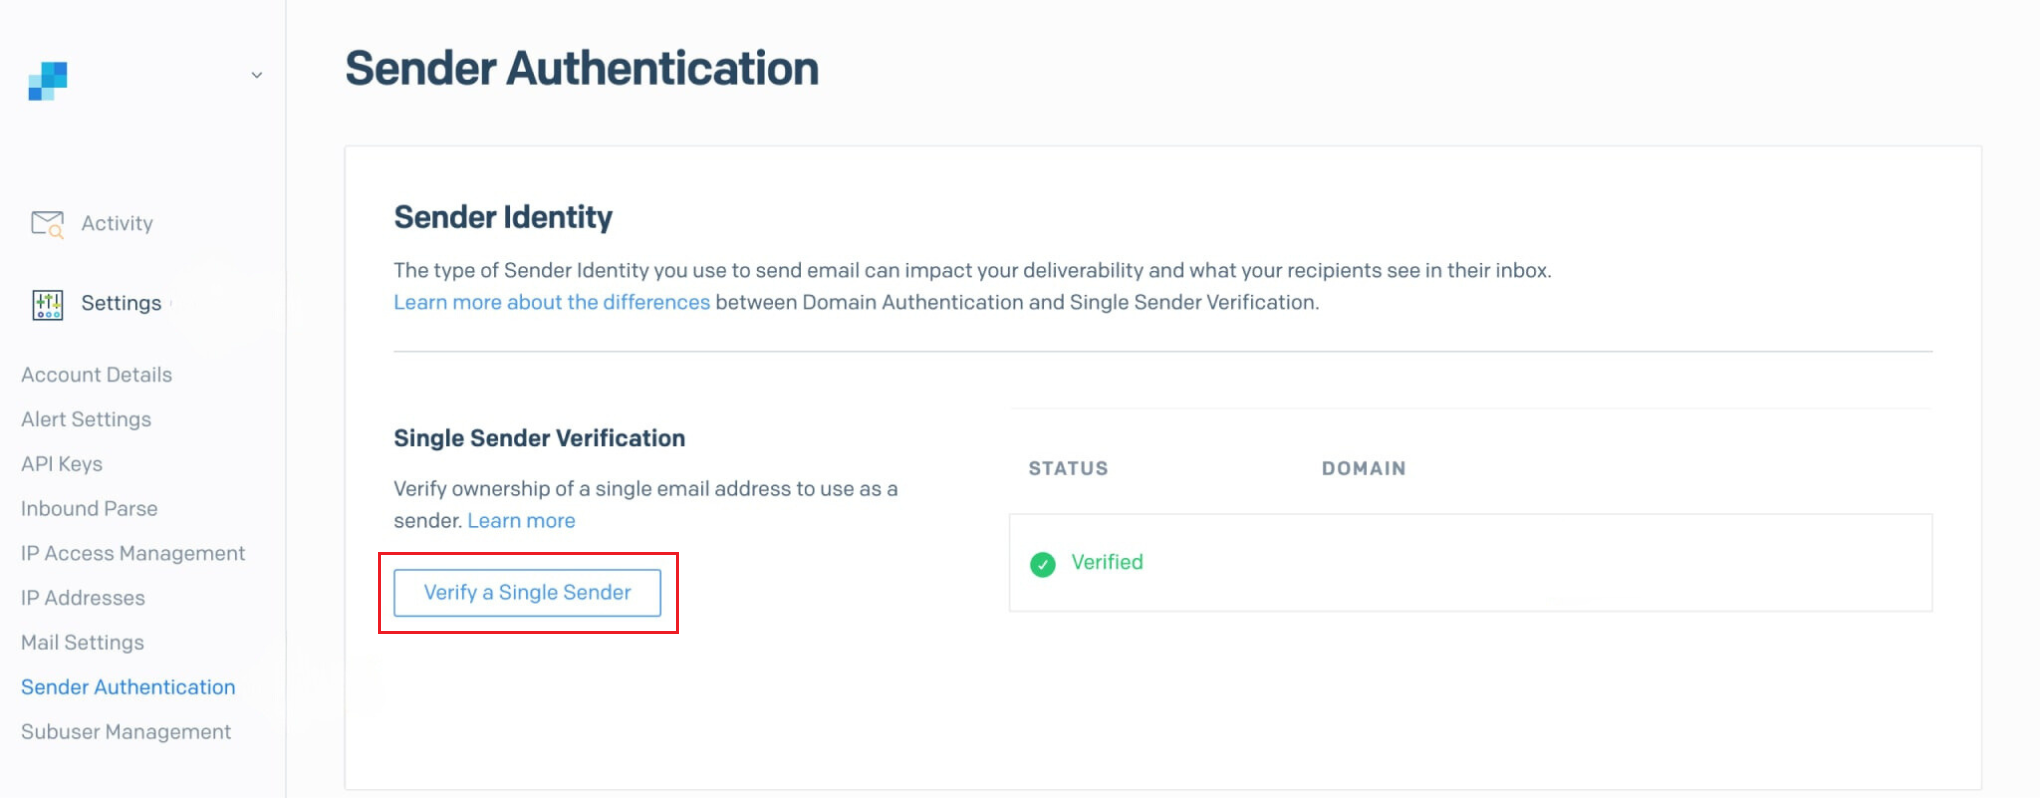
- For additional information and support on how to set up or access your SMTP credentials, check out SendGrid’s article here: Single Sender Verification | Twilio
Step 3: SMTP and API Settings
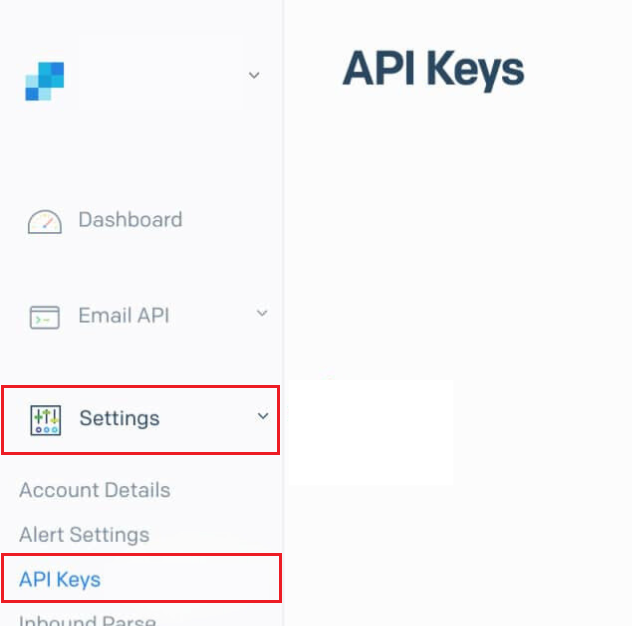
1. Access SMTP Settings: On the left-hand side, click on the “Settings” tab and then “API Keys” from the dropdown.
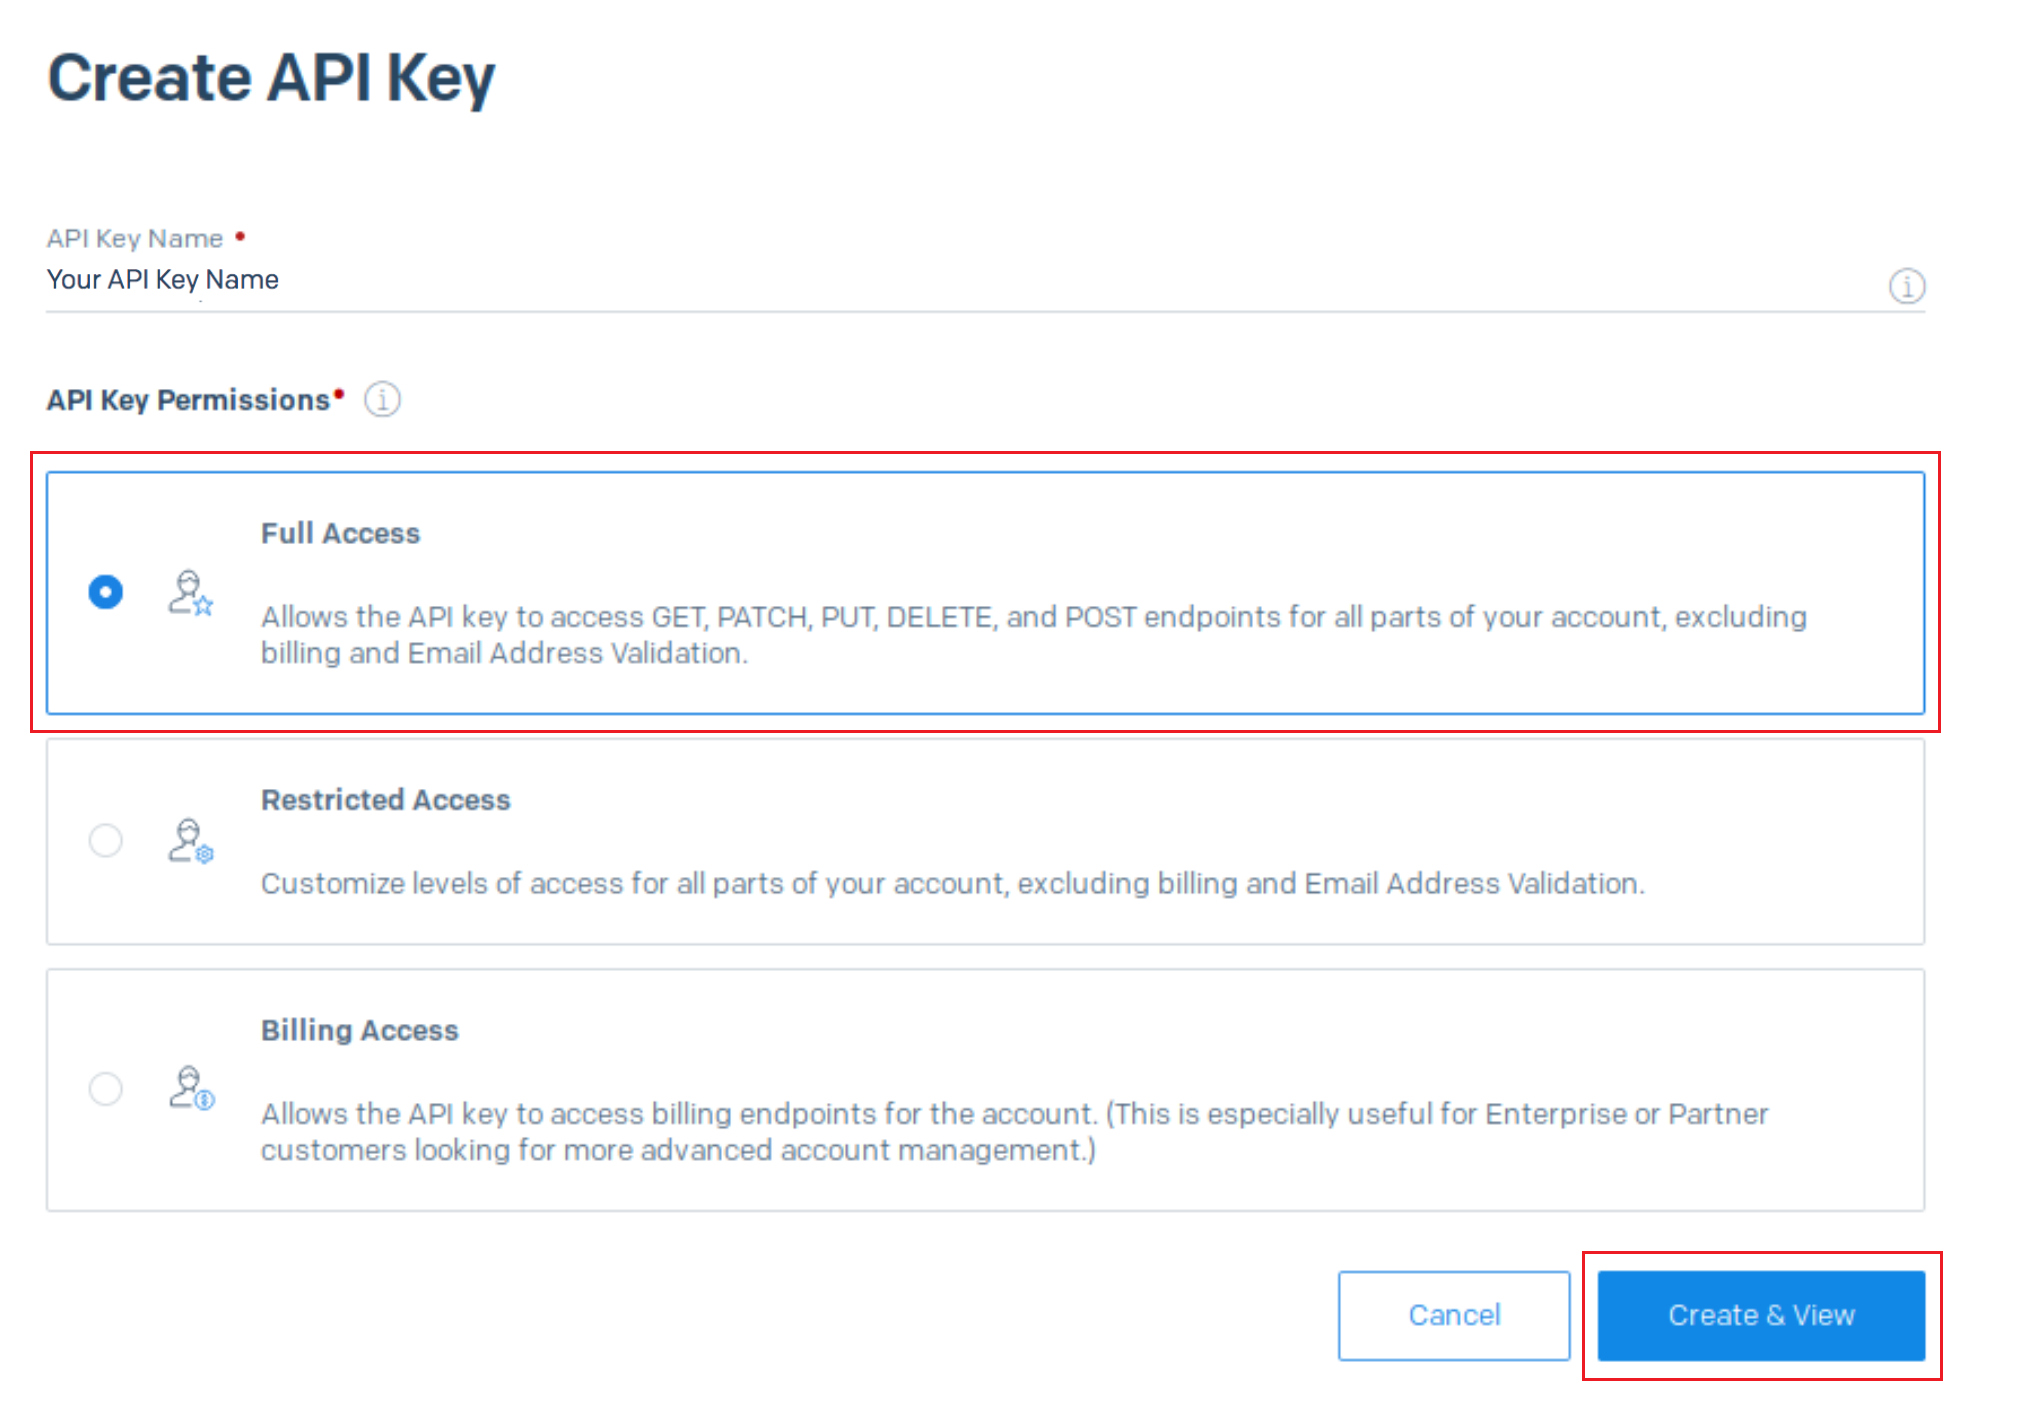
2. Create API Key: Click on the “Create API Key” button found at the top right-hand corner.

3. Permissions Access: Under API Key Permissions, select “Full Access” from the options then hit the “Create & View” button. This will be your SMTP password for integrating with Mailivery.
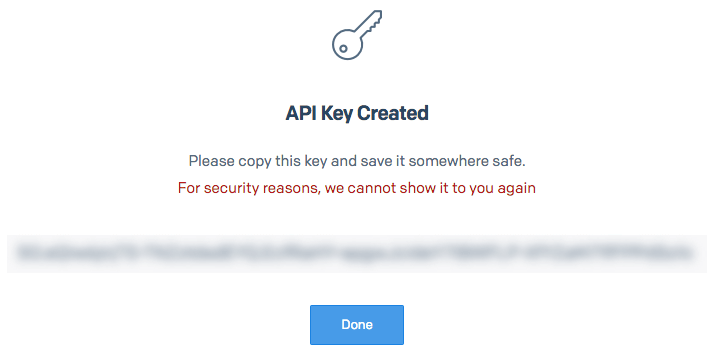
4. Copy API Key: Copy and save this for future reference as it will not be displayed again. Click the “Done” button when finished.
- For additional information and support on how to set up or integrate with the SMTP API, check out SendGrid’s article here: Integrating with the SMTP API | Twilio
Step 3: Configure Mailivery and SendGrid
1. Login to Mailivery.io: Visit Mailivery.io and log into your account.
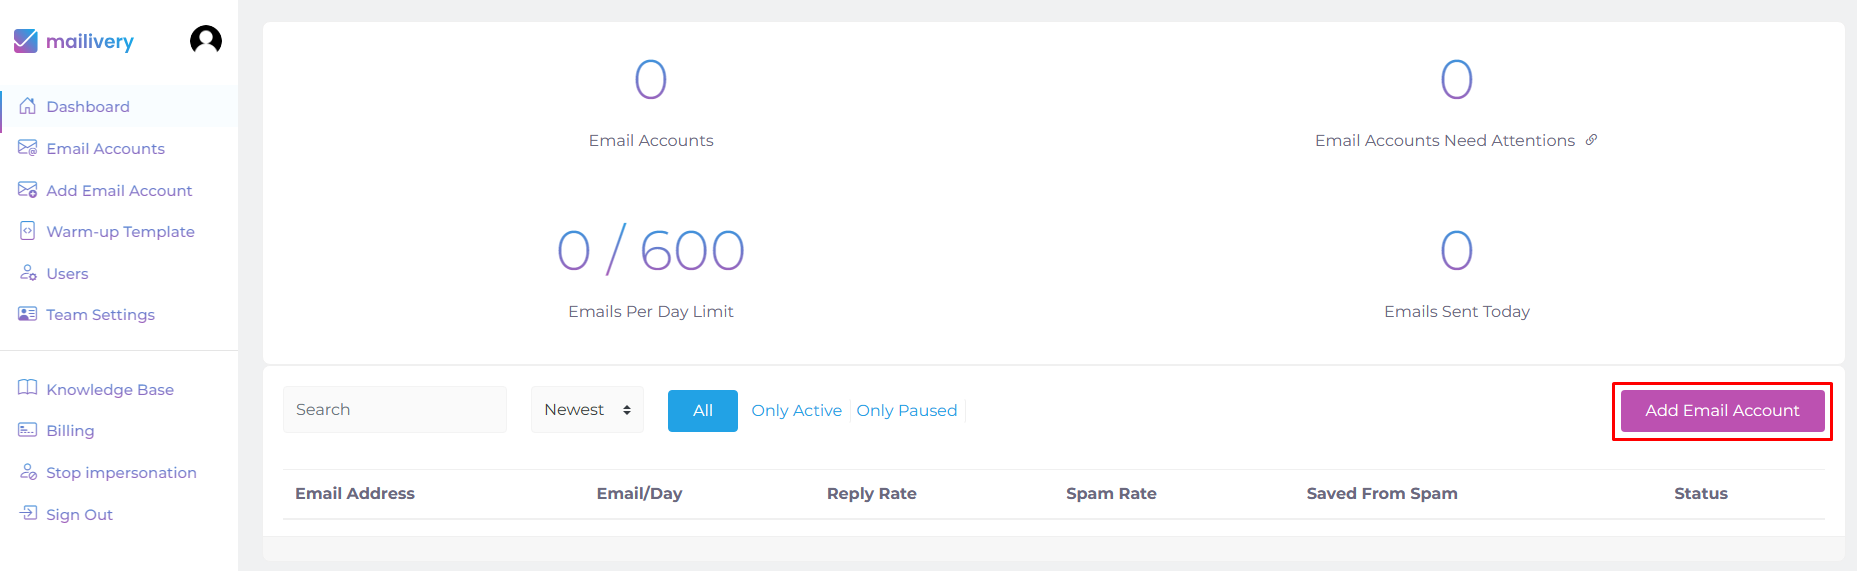
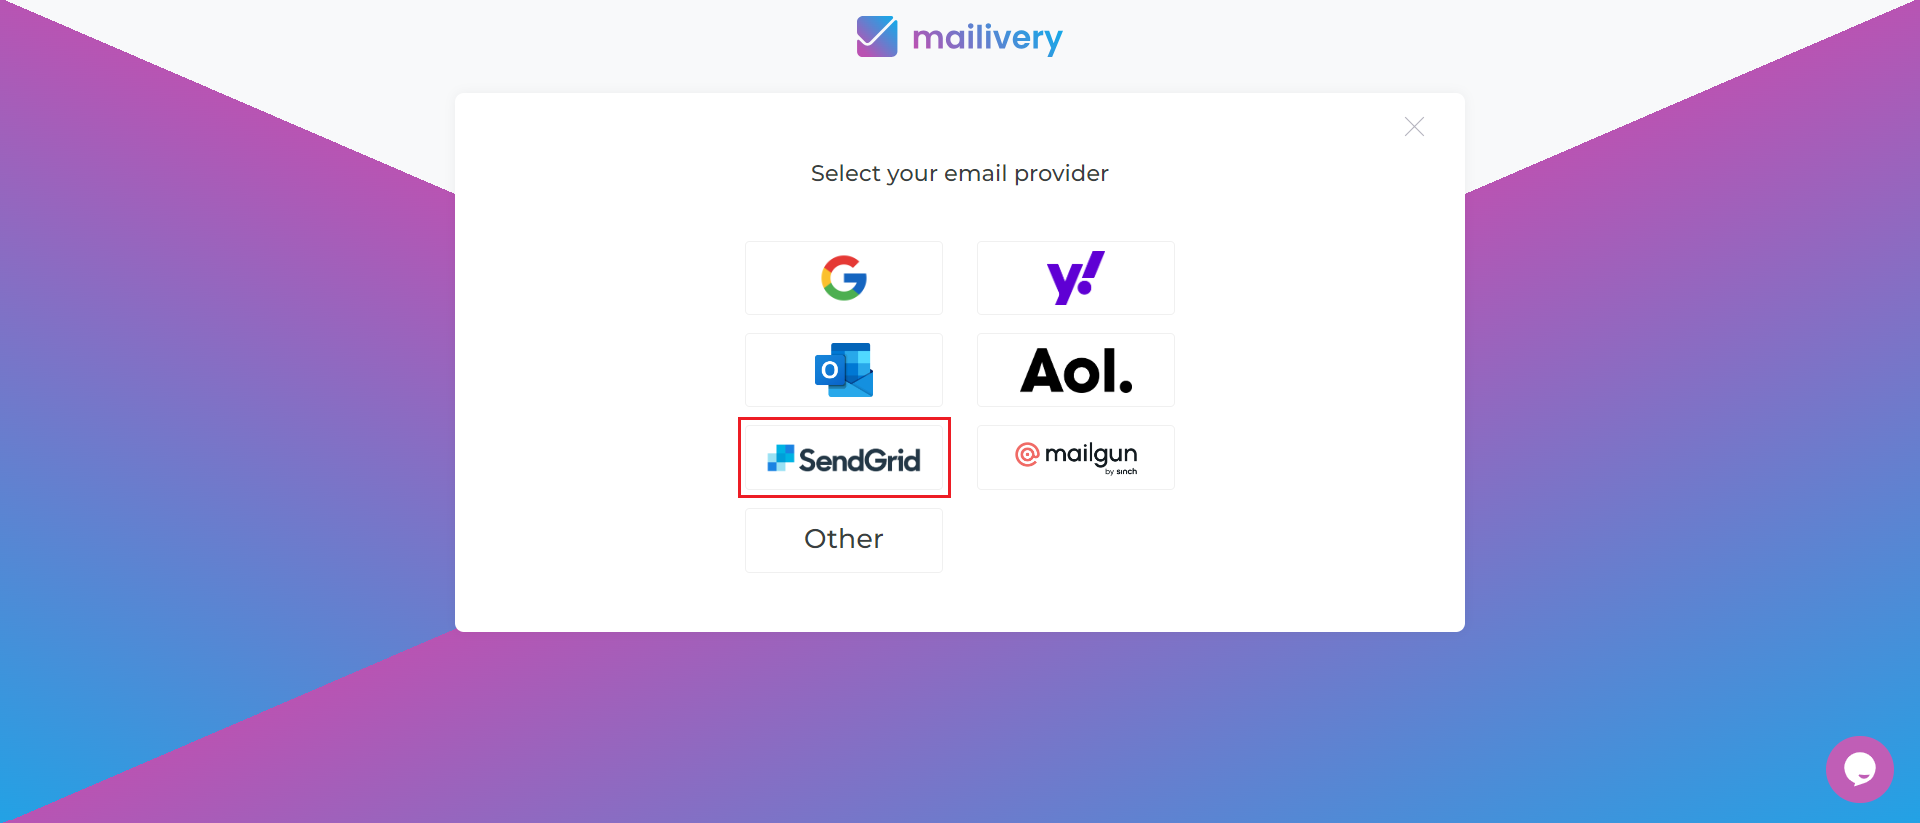
2. Add Email Account: In your Mailivery dashboard, click on "Add Email Account" and select "SendGrid" from the email provider options.
3. Configure SendGrid Email Details: Enter your credentials as necessary then click on the “Add and Proceed” button.
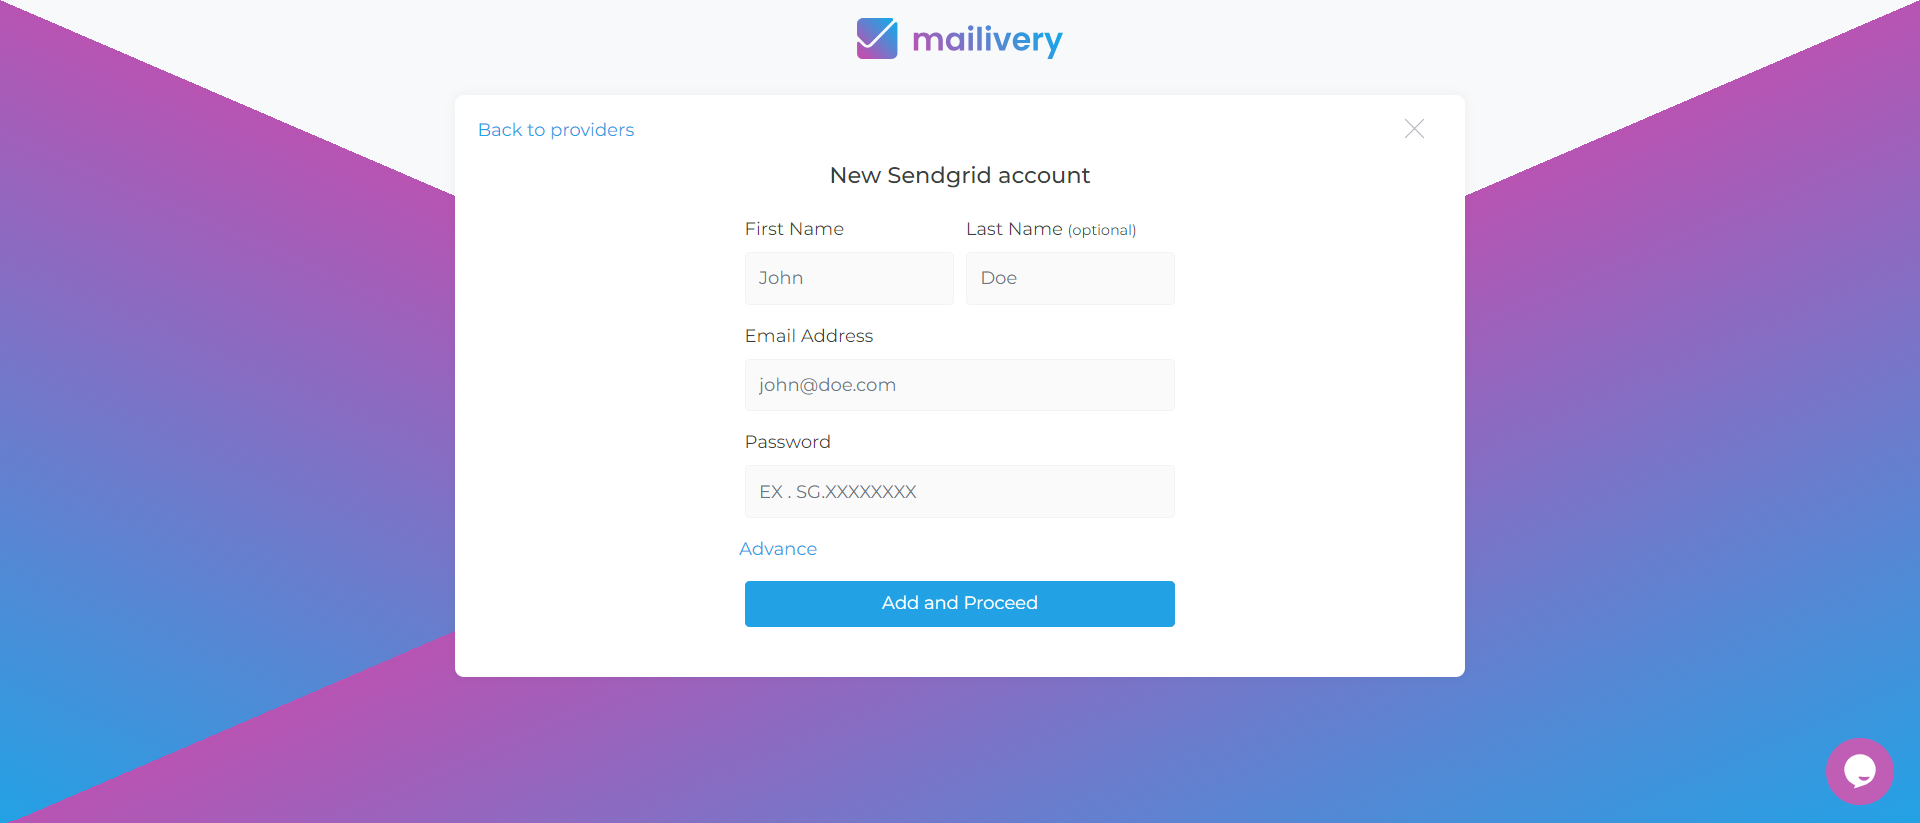
- From Name: Enter the sender's first and last name.
- Email Address: Input your SendGrid email address.
- Password: Input the SMTP password generated from SendGrid in the previous steps.
Step 4: Configure IMAP Details
1. IMAP Configuration: Configure IMAP for receiving and handling incoming emails and then hit the “Submit” button once done.
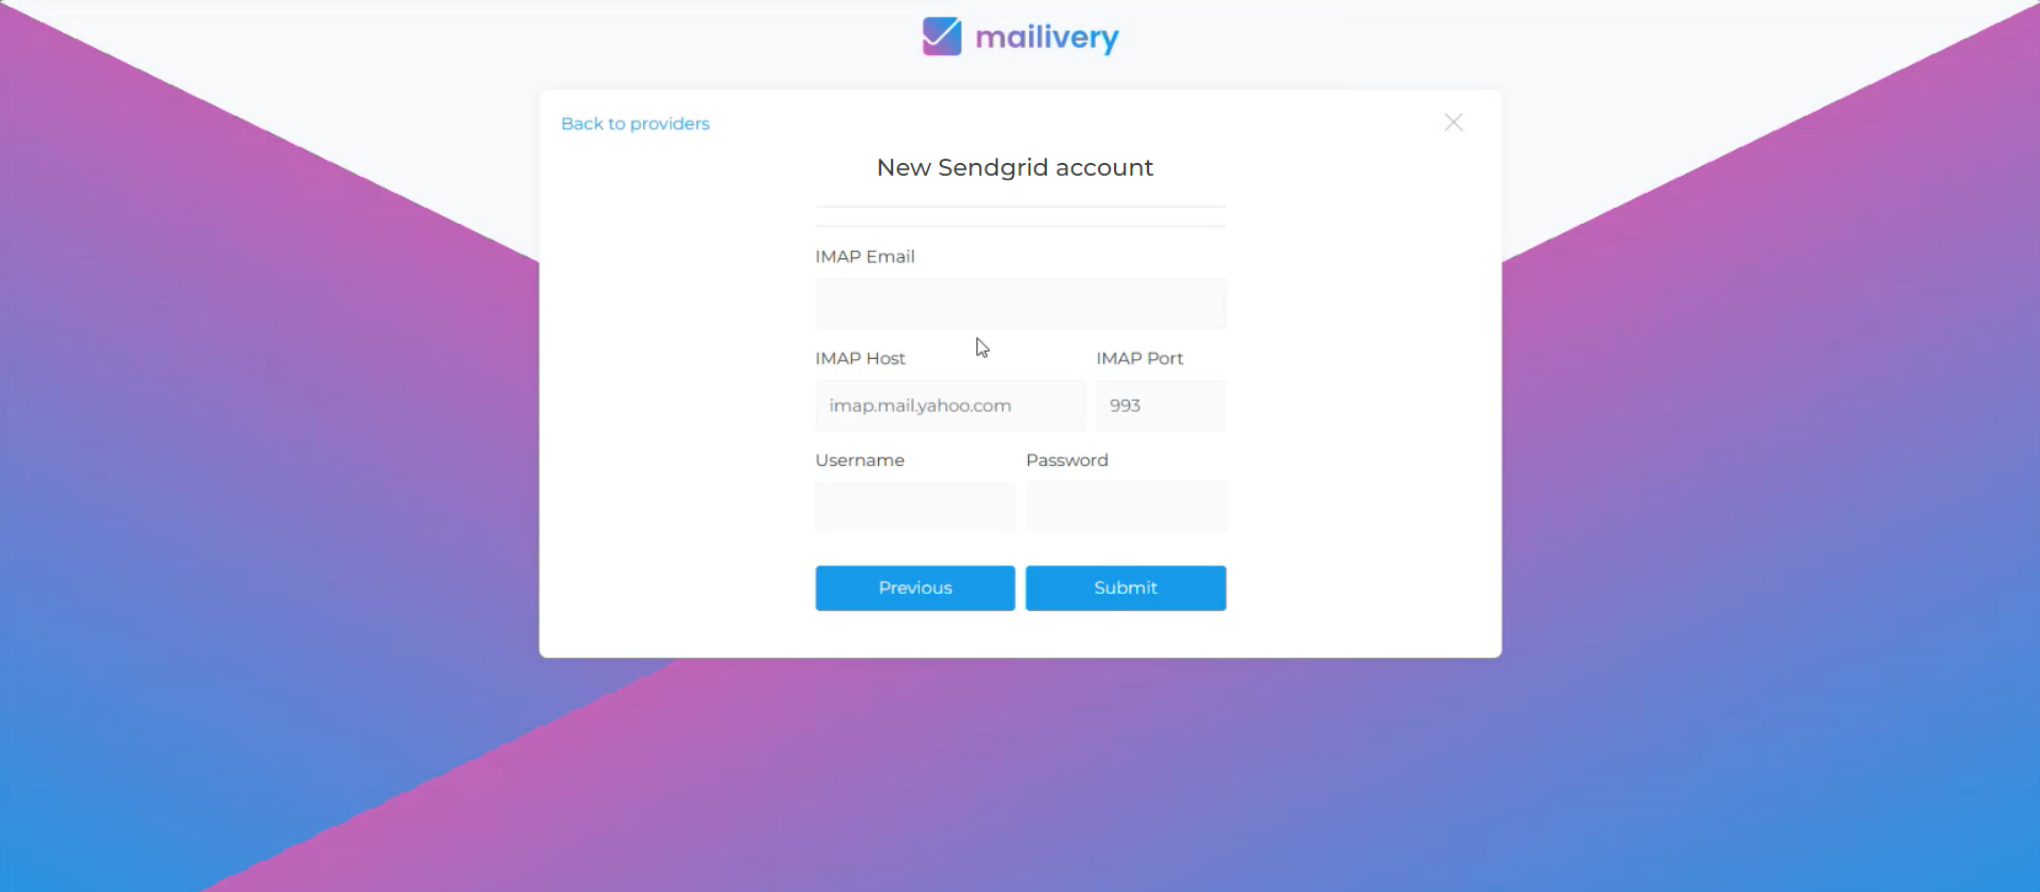
- IMAP Password: If using Gmail, generate an application password in Gmail settings. For other services, use the mailbox password.
- IMAP Host: Enter the IMAP host given by your email service (e.g., imap.gmail.com for Gmail, imappro.zoho.com for Zoho).
- For additional information and support on how to set up or access your IMAP credentials: kindly reach out directly to your individual domain providers.
You have now successfully connected your SendGrid inbox to Mailivery. This integration allows you to maximize the impact of your SendGrid email marketing efforts and drive better results for your business by leveraging Mailivery’s advanced email warmup and deliverability features. It eliminates the need for complex configurations and costly prepaid services, offering a streamlined solution for your email communication needs.